Automatic Defect Review for Media and Substrates
Higher Throughput, Automatic Defect Review
The Automatic Defect Review (Park ADR) in the NX-HDM speeds up and improves the way defects in substrates and media are identif ied, scanned, and analyzed. Using the defect location map provided from an optical inspection tool, Park ADR automatically goes to e ach of those locations, and images the defects in two steps:
(1) image a larger, survey scan to refine the defect location
(2) then image a smaller zoom-in scan to obtain the details of the defect. Test runs with real defects demonstrate a 10x increase in throughput for defect review in an automated process compared to conventional methods.
Automated Search Scan & Zoom-in Scan
Optimized scan parameters enable a fast two step scan:
(1) a quick, low resolution search scan to locate the defect
(2) a high resolution zoom-in scan to obtain defect details. The scan size and scan speed parameters are adjustable to match the user’s need.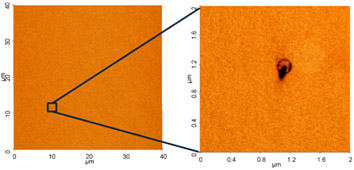
Automatic Transfer and Alignment of Defect Maps to AFM
Utilizing an advanced proprietary mapping algorithm, the defect map obtained from automated optical inspection (AOI) tool is accurately transferred and mapped onto Park NX-HDM. This technology allows full automation for high throughput defect imaging.
Map of Defect Coordinates from an Optical Inspection Tool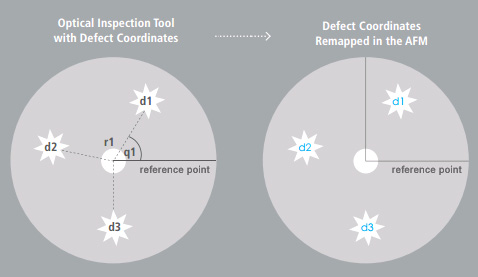
Accurate Sub-Angstrom Surface Roughness Measurement
Sub-Angstrom, Surface Roughness Measurement
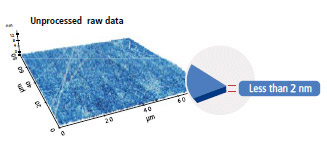
Increasingly, industries require ultra-flat media and substrate to address the ever-shrinking device dimensions. Park NX-HDM provides accurate sub-angstrom surface roughness measurements, scan after scan. Park NX-HDM, together with its industry’s lowest noise floor, and its unique True Non-Contact™ technology, it is the most accurate AFM for surface roughness measurement in the market.


Accurate AFM Scan by True Non-Contact™ Mode
True Non-Contact™ Mode

- Less tip wear = Prolonged high-resolution scan
- Non-destructive tip-sample interaction = Minimized sample modification
- Immunity from parameter dependent results

Tapping Imaging
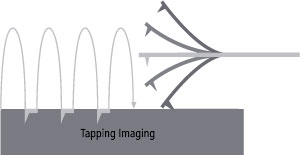
- Quick tip wear = Blurred low-resolution scan
- Destructive tip-sample interaction = Sample damage and modification
- Highly parameter-dependent

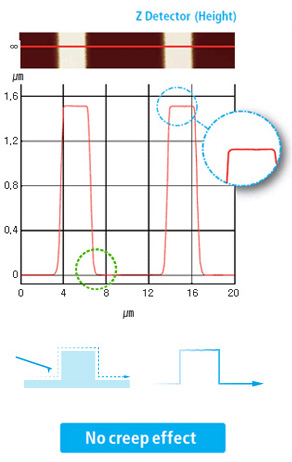
Accurate AFM Topography with Low Noise Z Detector
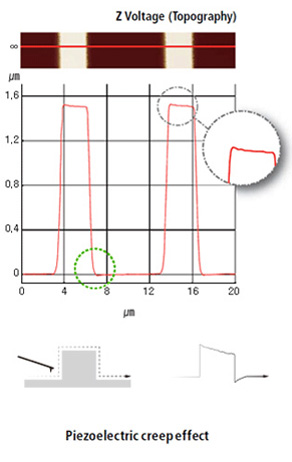
True Sample Topography™ without piezo creep error
- Low noise Z detector signal is used for Topography
- Low Z detector noise of 0.02 nm over large bandwidth
- No edge overshoot at the leading and trailing edges
- Calibration needs to be done only once at the factory
Park NX AFM
Conventional AFM
Park NX-HDM features
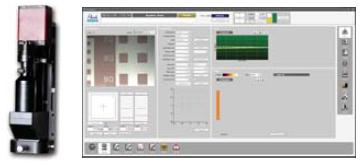
Utilizing a powerful combination of high resolution digital CCD camera and pattern recognition software, a fully automated pattern recognition and alignment is made possible for user applications.
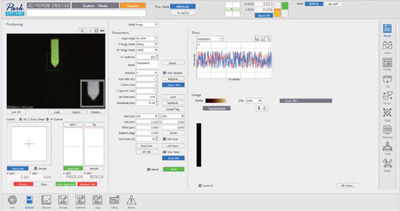
The NX-HDM is equipped with automated software that makes operation nearly effortless. Just select the desired measurement program to get precise multi-site analysis with optimized setting for cantilever tuning, scan rate, gain, and set point parameters as a recipe.
Park's user-friendly software interface gives you the flexibility to create customized operation routines (recipes) so you can access the full power of the NX-HDM and get the measurements you need.
Creating new recipes is easy. It takes about 10 minutes to create a new routine from scratch, or less than 5 minutes to modify an existing one.
Park NX-HDM provides these:
• Auto, semi-auto, and manual mode so you have complete contro
• Editable measurement method for each automated routine
• Live monitoring of the measurement process
• Automatic analysis of acquired measurement data
The XY scanner consists of symmetrical 2-dimensional flexure and high-force piezoelectric stacks that provide high orthogonal movement with minimal out-of-plane motion as well as the high responsiveness essential for precise sample scanning in the nanometer scale.
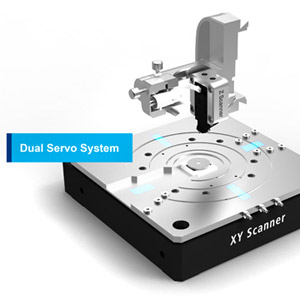
Two symmetric, low-noise position sensors are incorporated on each axis of the XY scanner to retain high scan orthogonality for the largest scan ranges and sample sizes. The secondary sensor corrects and compensates for non-linear and non-planar positional errors caused by a single sensor alone.
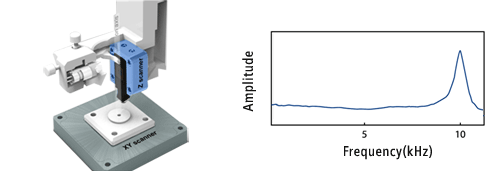 Driven by a high-force piezoelectric stack and guided by a flexure structure, the standard Z scanner has a high resonant frequency of more than 9 kHz (typically 10.5 kHz) and Z-servo speed of more than 48 mm/sec tip velocity which enables accurate feedback. The maximum Z scan range can be extended from 15um to 40um with the optional long scan range Z scanner.
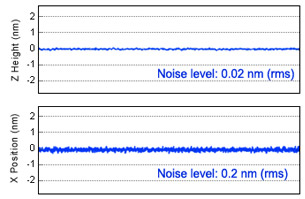 The industry leading low noise Z detector replaces the applied Z voltage as the Topography signal. In addition, the low noise XY closed loop scan minimizes the forward and backward scan gap to be less than 0.15% of the scan range.
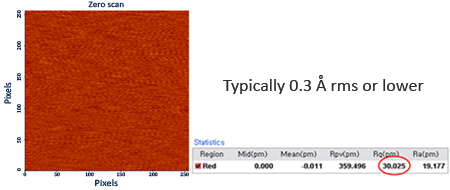
To detect the smallest sample features and image the flattest surfaces, Park Systems has engineered instruments which hold the industry’s lowest noise floor specification of < 0.5Å. Noise floor data is determined using a “zero scan”. With the cantilever in contact with the sample surface, the system noise is measured at a single point under the following conditions:
• 0 nm x 0 nm scan, staying in one point
• 0.5 gain, in contact mode
• 256 x 256 pixels

